Tips - B
Tips - B
Tips - B
Tips - B
Bandenspanning
De bandenspanning van je camper is van cruciaal belang, en dit voor comfort en veiligheid onderweg. Maar wat is de juiste bandenspanning voor campers?

Is de band niet genoeg opgepompt? Dan komt een groter oppervlak in contact met de weg. Dat vergroot de weerstand en dat zorgt voor meer slijtage en een hoger brandstofverbruik. Bovendien raakt de band dan sneller verhit, met alle mogelijke gevolgen van dien.

Het is verleidelijk om de banden uit voorzorg dan maar harder op te pompen dan voorgeschreven. Dat vergroot weliswaar de draagkracht, maar doet afbreuk aan het comfort. Bovendien is de remafstand alleen bij de correcte bandenspanning optimaal.

Je controleert je bandenspanning het best voor vertrek van een nieuwe trip. Bij de controle moet de band koud zijn; je mag er hoogstens 3 kilometer binnen de bebouwde kom mee hebben gereden. Als de temperatuur van de band stijgt, neemt namelijk ook de spanning toe en dat geeft een vertekend beeld.

Juiste bandenspanning!

De maximale bandenspanning kan je aflezen op de band van je camper. Om compleet te zijn, geef ik ook een verklaring voor de andere noteringen op de band.

Op mijn banden (Michelin radial X) staan volgende waarden genoteerd:

235/65R16C    115/113 R      AT 65 PSI

235: is de bandbreedte in mm
65: geeft de verhouding hoogte/breedte in % weer, in mijn geval is de hoogte 65% van de breedte
R: is radiaalband
16: geeft de diagonaal van de band weer in inches

115/113 geeft de draagvermogen indexen per band weer. De eerste index voor enkellucht band, de tweede voor dubbellucht. De R geeft de snelheidsindex weer (is de maximale snelheid voor de banden)
Hieronder vindt je een tabelletje die de lastindex (LI) omzet in kg en de snelheidsindexen.

Draagvermogen


LI

kg

LI

kg

LI

kg

100

800

109

1030

118

1320

101

825

110

1060

119

1360

102

850

111

1090

120

1400

103

875

112

1120

121

1450

104

900

113

1150

122

1500

105

925

114

1180

123

1550

106

950

115

1215

124

1600

107

975

116

1250


108

1000

117

1285


Snelheidsindex


Klasse

Km/u

Klasse

Km/u

Klasse

Km/u

E

70

M

130

T

190

F

80

N

140

U

200

G

90

P

150

H

210

J

100

Q

160

V

240

K

110

R

170

W

270

L

120

S

180

Y

300


Nu de notering voor de bandenspanning

AT 65 PSI

65 psi = 4,5 bar. Is dus de maximale bandenspanning. Op het internet staan verscheidene tools die de psi waarde omrekenen naar bar; de eenheid die wij gebruiken
.
E-mail: info@dmcamperreizen.be

Copyright © DMCamperreizen 2018.
All right reserved.
Bip&Go
I use a Bip & Go badge to drive on the toll roads in France. No more hassle with change or squeezing yourself into all possible positions to still be able to take your ticket from the machine or present your credit card. Several times I hurt my back by forcing. The last few times I always got out of the car at the “péage”, to be able to pay comfortably. Sometimes to the frustration of drivers of vehicles behind who thought it was not going fast enough.
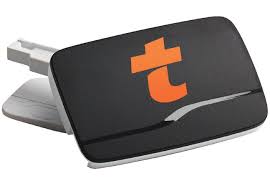
The Bip & Go badge is an electronic toll payment device that allows you to drive on all French motorways, regardless of the company that operates them. You can also pay the toll on many other buildings; such as the Viaduct of Millau, the bridge to the Île de Ré, the bridge of Tancarville and the “Pont de Normandie” and is valid on almost 400 parking lots.
The badge can also be used on the Spanish, Portuguese and Italian highways, some equipped car parks in Spain and Italy and certain ferries in Italy.
How much does this cost?

I myself use the formula for “incidental users”. If, like me, you only use the motorway a few times a year, then this is the right formula for you.
On top of the toll costs you pay € 1.70 extra per month driven for France. For Spain, Portugal and Italy this is € 2.50 per month, on top of € 1.70 for France. The months that you do not use the badge, no extra costs will be charged.
You pay 10 € once for commissioning + 10 € shipping costs (Belgium). The badge itself is free and you will receive a holder (to be stuck to the windscreen). At the time of subscription I received a discount of 5 €.
So if, for example, you used the toll roads from 1 to 28 June and you owe a toll of 62 €, you pay 62 + 1.70 = 63.70 €. For example, if you drove around on the same roads from July 15 to August 15, you pay for 2 months: 62 + 1.70 + 1.70 = € 65.40.
Your highway badge registers your expenses and you receive a monthly detailed monthly of your highway routes and parking costs.

If you take the highway at least once a month, it is better to use the formula “frequent users”. Then, on top of the toll costs, you pay € 16 per year (that is € 1.33 / month). The commissioning costs and the shipping costs remain the same. The invoicing is also the same.

How is payment done?

Your invoices are available between the 10th and 15th day of the month after your trajectories. The debit is carried out after the 15th of the month after your trajectories. Invoices are paid exclusively by direct debit.

What is on your invoice?

for the routes:
- the date of driving past the toll booth,
- the toll category,
- the route covered,
- the all-in amount of the toll regarding parking in the car parks:
- the date of departure from the car park,
- the all-in amount of the parking fee,
- the name of the car park
Placement of the badge

It is recommended to attach the badge to the vehicle's windshield to the right of the rearview mirror so that it is detected correctly. If your vehicle is equipped with a windshield with a black dotted band, a non-heat absorbing zone, the badge must be placed on it to be detected. Tampering with the badge while driving through the toll plaza can cause it to be poorly detected, leading to anomalous billing.
If you are difficult to detect (because the badge is above the detection zone), the Liber-t Bip & Go badge can be placed at the bottom of the windshield, in the middle of the dashboard.
There are many people who simply put the badge on the dashboard! I have not tried this myself.
How do you use the badge with the motorhome now?

As soon as your badge is activated and placed on the windscreen, you can use it.

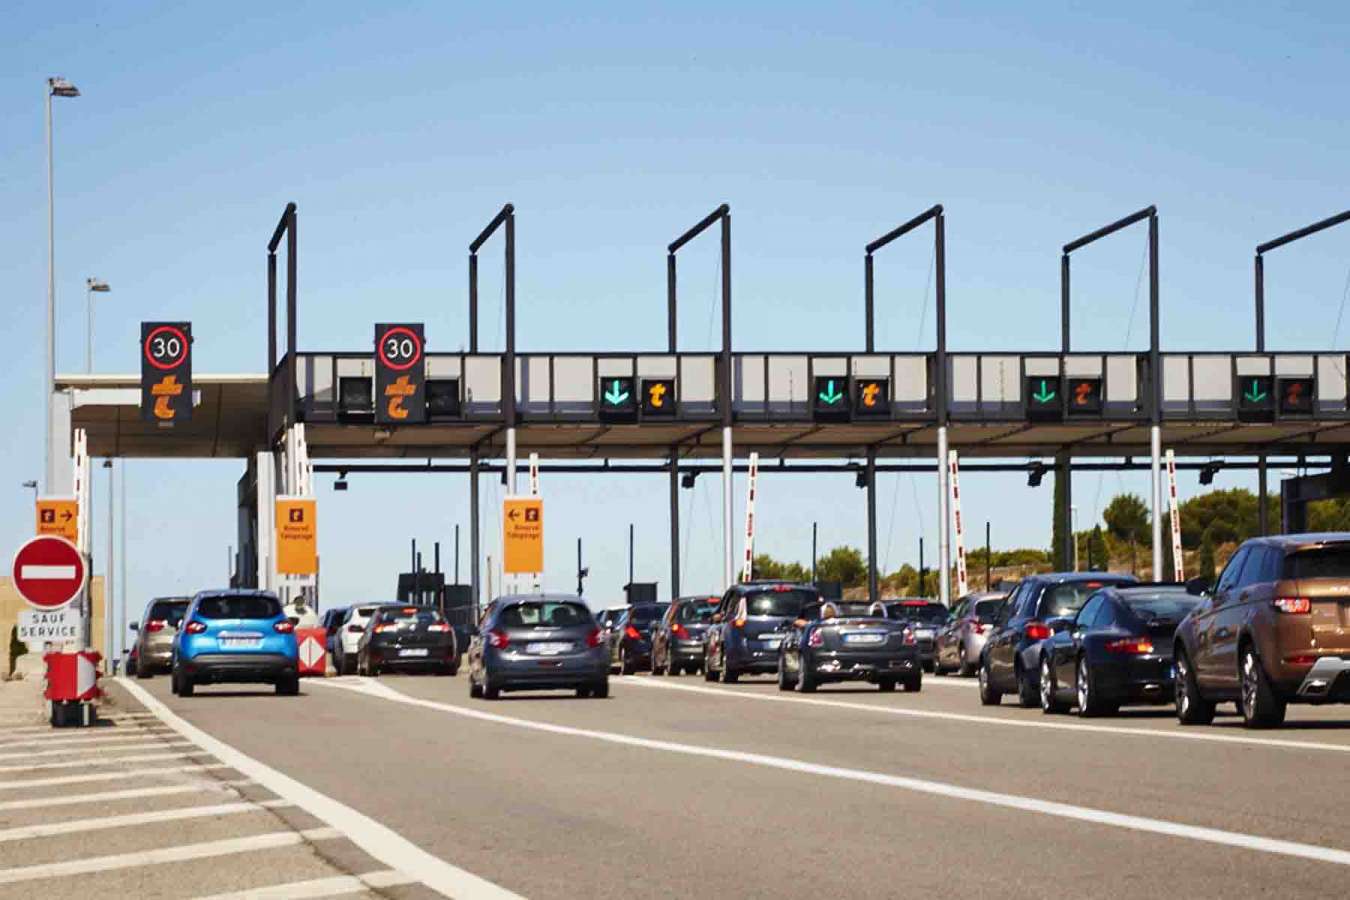
Choose one of the lanes "all classes" that are often located on the right of the toll plaza, or the lanes without height restriction, which are indicated with the symbol ! or !!. Continue slowly to the barrier (keep a distance of 4 meters with the vehicle in front of you). Your badge beeps, the light turns green and the barrier goes up: you can drive on!

At the major toll stations in France, you can continue at a speed of 30 km / h without stopping, or even 50 km / h at the Montesson toll station on the A14 motorway. Paying toll electronically without stopping means smoother driving, fuel savings and environmental friendliness due to lower CO2 emissions. To do this, use the lanes marked with the symbol

Pay attention! Many of these courses are only suitable for class 1 passenger cars, access is limited to a height of 2 m.
Most motorhomes are class 2 vehicles: i.e. motorhomes that are higher than 2m and lower than 3m and weigh less (or equal to) 3.5 tons. Normally only height is measured.

If your camper is higher than 3 meters, you belong to class 3.
Large buses with 3 axles or more are in class 4.

Sometimes classes 2 and 3 give problems to the péage. Despite you being class 2, you will be charged for class 3.

How much does my route cost?

See the article toll rates in Europe in the tips on this website.

E-mail: info@dmcamperreizen.be

Copyright © DMCamperreizen 2018. All right reserved.

Copyright © DMCamperreizen 2018. All right reserved.
Bip&Go
I use a Bip & Go badge to drive on the toll roads in France. No more hassle with change or squeezing yourself into all possible positions to still be able to take your ticket from the machine or present your credit card. Several times I hurt my back by forcing. The last few times I always got out of the car at the “péage”, to be able to pay comfortably. Sometimes to the frustration of drivers of vehicles behind who thought it was not going fast enough.
The Bip & Go badge is an electronic toll payment device that allows you to drive on all French motorways, regardless of the company that operates them. You can also pay the toll on many other buildings; such as the Viaduct of Millau, the bridge to the Île de Ré, the bridge of Tancarville and the “Pont de Normandie” and is valid on almost 400 parking lots.
The badge can also be used on the Spanish, Portuguese and Italian highways, some equipped car parks in Spain and Italy and certain ferries in Italy.
How much does this cost?

I myself use the formula for “incidental users”. If, like me, you only use the motorway a few times a year, then this is the right formula for you.
On top of the toll costs you pay € 1.70 extra per month driven for France. For Spain, Portugal and Italy this is € 2.50 per month, on top of € 1.70 for France. The months that you do not use the badge, no extra costs will be charged.
You pay 10 € once for commissioning + 10 € shipping costs (Belgium). The badge itself is free and you will receive a holder (to be stuck to the windscreen). At the time of subscription I received a discount of 5 €.
So if, for example, you used the toll roads from 1 to 28 June and you owe a toll of 62 €, you pay 62 + 1.70 = 63.70 €. For example, if you drove around on the same roads from July 15 to August 15, you pay for 2 months: 62 + 1.70 + 1.70 = € 65.40.
Your highway badge registers your expenses and you receive a monthly detailed monthly of your highway routes and parking costs.

If you take the highway at least once a month, it is better to use the formula “frequent users”. Then, on top of the toll costs, you pay € 16 per year (that is € 1.33 / month). The commissioning costs and the shipping costs remain the same. The invoicing is also the same.

How is payment done?

Your invoices are available between the 10th and 15th day of the month after your trajectories. The debit is carried out after the 15th of the month after your trajectories. Invoices are paid exclusively by direct debit.

What is on your invoice?

for the routes:
- the date of driving past the toll booth,
- the toll category,
- the route covered,
- the all-in amount of the toll regarding parking in the car parks:
- the date of departure from the car park,
- the all-in amount of the parking fee,
- the name of the car park
Placement of the badge

It is recommended to attach the badge to the vehicle's windshield to the right of the rearview mirror so that it is detected correctly. If your vehicle is equipped with a windshield with a black dotted band, a non-heat absorbing zone, the badge must be placed on it to be detected. Tampering with the badge while driving through the toll plaza can cause it to be poorly detected, leading to anomalous billing.
If you are difficult to detect (because the badge is above the detection zone), the Liber-t Bip & Go badge can be placed at the bottom of the windshield, in the middle of the dashboard.
There are many people who simply put the badge on the dashboard! I have not tried this myself.
How do you use the badge with the motorhome now?

As soon as your badge is activated and placed on the windscreen, you can use it.

Choose one of the lanes "all classes" that are often located on the right of the toll plaza, or the lanes without height restriction, which are indicated with the symbol ! or !!. Continue slowly to the barrier (keep a distance of 4 meters with the vehicle in front of you). Your badge beeps, the light turns green and the barrier goes up: you can drive on!

At the major toll stations in France, you can continue at a speed of 30 km / h without stopping, or even 50 km / h at the Montesson toll station on the A14 motorway. Paying toll electronically without stopping means smoother driving, fuel savings and environmental friendliness due to lower CO2 emissions. To do this, use the lanes marked with the symbol

Pay attention! Many of these courses are only suitable for class 1 passenger cars, access is limited to a height of 2 m.
Most motorhomes are class 2 vehicles: i.e. motorhomes that are higher than 2m and lower than 3m and weigh less (or equal to) 3.5 tons. Normally only height is measured.

If your camper is higher than 3 meters, you belong to class 3.
Large buses with 3 axles or more are in class 4.

Sometimes classes 2 and 3 give problems to the péage. Despite you being class 2, you will be charged for class 3.

How much does my route cost?

See the article toll rates in Europe in the tips on this website.

E-mail: info@dmcamperreizen.be

Copyright © DMCamperreizen 2018.
All right reserved.
Bip&Go
I use a Bip & Go badge to drive on the toll roads in France. No more hassle with change or squeezing yourself into all possible positions to still be able to take your ticket from the machine or present your credit card. Several times I hurt my back by forcing. The last few times I always got out of the car at the “péage”, to be able to pay comfortably. Sometimes to the frustration of drivers of vehicles behind who thought it was not going fast enough.
The Bip & Go badge is an electronic toll payment device that allows you to drive on all French motorways, regardless of the company that operates them. You can also pay the toll on many other buildings; such as the Viaduct of Millau, the bridge to the Île de Ré, the bridge of Tancarville and the “Pont de Normandie” and is valid on almost 400 parking lots.
The badge can also be used on the Spanish, Portuguese and Italian highways, some equipped car parks in Spain and Italy and certain ferries in Italy.
How much does this cost?

I myself use the formula for “incidental users”. If, like me, you only use the motorway a few times a year, then this is the right formula for you.
On top of the toll costs you pay € 1.70 extra per month driven for France. For Spain, Portugal and Italy this is € 2.50 per month, on top of € 1.70 for France. The months that you do not use the badge, no extra costs will be charged.
You pay 10 € once for commissioning + 10 € shipping costs (Belgium). The badge itself is free and you will receive a holder (to be stuck to the windscreen). At the time of subscription I received a discount of 5 €.
So if, for example, you used the toll roads from 1 to 28 June and you owe a toll of 62 €, you pay 62 + 1.70 = 63.70 €. For example, if you drove around on the same roads from July 15 to August 15, you pay for 2 months: 62 + 1.70 + 1.70 = € 65.40.
Your highway badge registers your expenses and you receive a monthly detailed monthly of your highway routes and parking costs.

If you take the highway at least once a month, it is better to use the formula “frequent users”. Then, on top of the toll costs, you pay € 16 per year (that is € 1.33 / month). The commissioning costs and the shipping costs remain the same. The invoicing is also the same.

How is payment done?

Your invoices are available between the 10th and 15th day of the month after your trajectories. The debit is carried out after the 15th of the month after your trajectories. Invoices are paid exclusively by direct debit.

What is on your invoice?

for the routes:
- the date of driving past the toll booth,
- the toll category,
- the route covered,
- the all-in amount of the toll regarding parking in the car parks:
- the date of departure from the car park,
- the all-in amount of the parking fee,
- the name of the car park
Placement of the badge

It is recommended to attach the badge to the vehicle's windshield to the right of the rearview mirror so that it is detected correctly. If your vehicle is equipped with a windshield with a black dotted band, a non-heat absorbing zone, the badge must be placed on it to be detected. Tampering with the badge while driving through the toll plaza can cause it to be poorly detected, leading to anomalous billing.
If you are difficult to detect (because the badge is above the detection zone), the Liber-t Bip & Go badge can be placed at the bottom of the windshield, in the middle of the dashboard.
There are many people who simply put the badge on the dashboard! I have not tried this myself.
How do you use the badge with the motorhome now?

As soon as your badge is activated and placed on the windscreen, you can use it.

Choose one of the lanes "all classes" that are often located on the right of the toll plaza, or the lanes without height restriction, which are indicated with the symbol ! or !!. Rij langzaam door tot de slagboom (hou wel een afstand van 4 meter aan met het voertuig voor jou). Je badge piept, het licht wordt groen en de slagboom gaat omhoog: je kan doorrijden!

Op de grote tolstations in Frankrijk kan je met elektronisch betalen zonder stoppen met een snelheid van 30 km/u doorrijden, of zelfs 50 km/u bij het tolstation van Montesson op de snelweg A14. Elektronisch tol betalen zonder stoppen, betekent vloeiender rijden, brandstofbesparing en milieuvriendelijkheid door een lagere CO2-uitstoot. Gebruik hiervoor de banen aangeduid met het symbool 

Let op! Vele van deze banen zijn enkel geschikt voor personenauto’s van klasse 1, de toegang is beperkt tot 2 m hoogte.
Continue slowly to the barrier (keep a distance of 4 meters with the vehicle in front of you). Your badge beeps, the light turns green and the barrier goes up: you can drive on!

At the major toll stations in France, you can continue at a speed of 30 km / h without stopping, or even 50 km / h at the Montesson toll station on the A14 motorway. Paying toll electronically without stopping means smoother driving, fuel savings and environmental friendliness due to lower CO2 emissions. To do this, use the lanes marked with the symbol

Pay attention! Many of these courses are only suitable for class 1 passenger cars, access is limited to a height of 2 m.

Most motorhomes are class 2 vehicles: i.e. motorhomes that are higher than 2m and lower than 3m and weigh less (or equal to) 3.5 tons. Normally only height is measured.

If your camper is higher than 3 meters, you belong to class 3.
Large buses with 3 axles or more are in class 4.

Sometimes classes 2 and 3 give problems to the péage. Despite you being class 2, you will be charged for class 3.

How much does my route cost?

See the article toll rates in Europe in the tips on this website.
E-mail: info@dmcamperreizen.be

Copyright © DMCamperreizen 2018.
All right reserved.